Within the Manufacturers page, users can set up various options to specialize OASIS to their specific needs. Users can add to or adjust settings as needed. This article will discuss the available settings used when configuring manufacturers.
Using the Manufacturer Configuration Tool
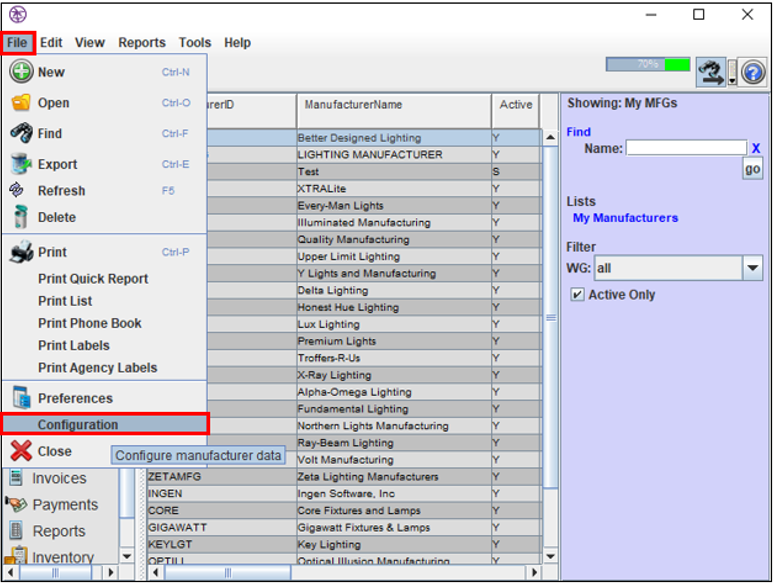
1. Navigate to the Manufacturers page.
2. Select "File."
3. Select "Configuration."
The MFG. Prod. Types Tab
1. Use this tab to identify Manufacturer Product types. These can be used in price lists within OASIS.
2. Select the  button to add product types, and select the
  button to remove product types.
3. Change a product type by double-clicking in the field you wish to change.
The Currency Tab
1. Use this tab to identify currencies and exchange rates of different territories.
2. Select the button to add a currency, and select the button to remove currency.
3. Change a currency by double-clicking in the field you wish to change.
The Comm Opportunity Tab
1. Use this tab to identify territory credit opportunities. These will show when setting up a manufacturer.
2. Select the button to add credit opportunities, and select the button to remove credit opportunities.
3. Change a credit opportunity by double-clicking on the field you wish to change.
4. Select "OK."
The Phone Kinds Tab
1. Use this tab to track any contact information for a manufacturer.
2. Select the button to add kinds, and select the button to remove kinds.
3. Change a kind by double-clicking the kind you wish to change.
The Part Quantity Tab
1. Use this tab to identify part quantities to choose from on the PO line.
2. Add a part quantity by selecting the button and remove a part quantity by selecting the button.
3. Change a part quantity by double-clicking in the field you wish to change.
The Unit Quantity Tab
1. Use this tab to identify unit quantities to choose from on the PO line.
2. Alter this tab only if you are using the "UQ" column in Quotes or Orders.
3. Select the button to add a unit quantity, and select the button to remove a unit quantity.
4. Change a product class by double-clicking in the field you wish to change.
Comments
0 commentsPlease sign in to leave a comment.