OASIS users, who are using the inventory page for the first time, must create a warehouse. Users can track and change restock and resell inventory settings through the "Warehouse Editor."
Creating a Warehouse
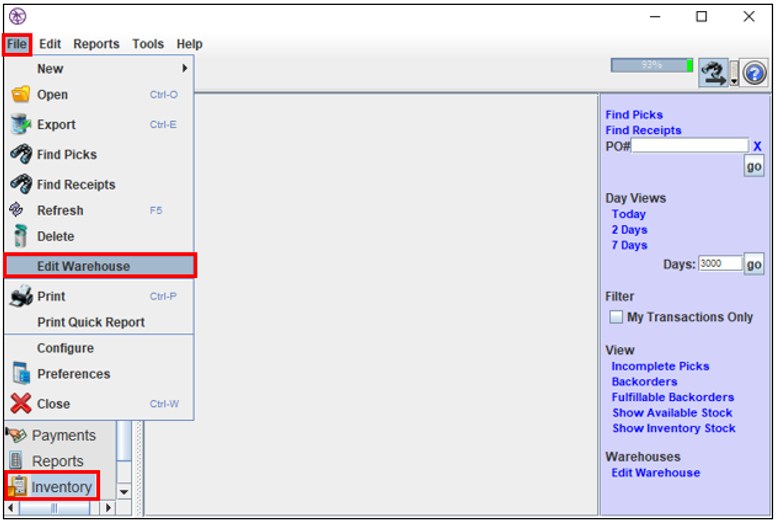
1. Navigate to the Inventory page.
2. Select "File," and then select "Edit Warehouse" OR select the "Edit Warehouse" link on the right side of the screen.
3. The "Warehouse Editor" window will appear.
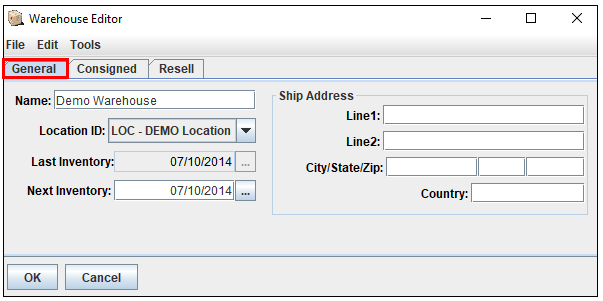
The General Tab
1. Use this tab to store basic information related to the warehouse.
- Name- insert the name of the warehouse.
- Location ID- insert the location ID of the warehouse.
- Last Inventory- insert the date of the last inventory.
- Next Inventory- insert the date of the next inventory.
- Ship Address- insert the warehouse address.
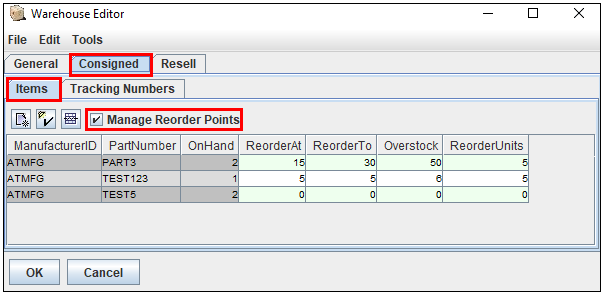
The Consigned Tab
1. Use this tab to manage restocking the inventory.
2. Select the "Items" tab to store information on reorders.
3. Select the  button to audit items, and select the button
  to remove lines.
4. Check the "Manage Reorder Points" box to view reorder settings.
- Manufacturer ID- insert the ID for the manufacturer.
- Part Number- insert the part number.
- OnHand- insert the amount you have in stock
- ReorderAt- insert the point you wish to start the reorder. If the available quantity falls below this number, the reorder logic will suggest restocking this part.
- ReorderTo- insert the quantity you want to reach.
- Overstock- insert the maximum quantity you do not wish to exceed.
- ReorderUnits- insert the increments you wish to order in.
5. Select the "Tracking Numbers" tab to store tracking numbers per manufacturer.
6. Select the  button to add lines and the
  button to remove lines.
7. Double-click in a field to edit it.
![]()
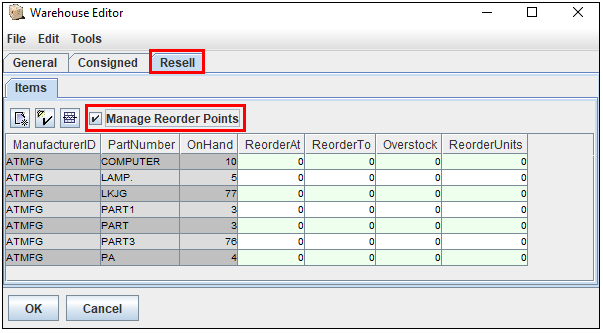
The Resell Tab
1. Use this tab to store information about products that you wish to resell from the inventory.
2. Select the button to audit items, and select the button to remove items
3. Check the "Manage Reorder Points" box to view reorder settings.
Comments
0 commentsPlease sign in to leave a comment.