This article will explain how to set up the specialization for H.E. Williams. To complete this process, users must obtain authorization from H.E. Williams.
Setting up HEW Connectivity
1. Navigate to the Manufacturers page.
2. Open the manufacturer entry for H.E. Williams.
3. The "Manufacturer Editor" will appear.
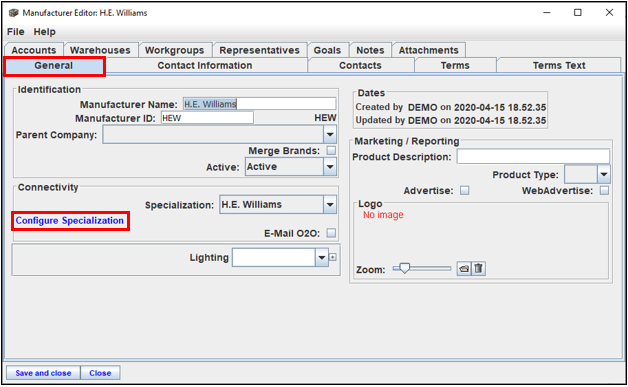
4. In the "General" tab, set the "Active" field to "Active."
5. Locate the "Connectivity" area.
6. Set the "Specialization" field to "H.E. Williams."

7. Select the "Configure Specialization" link.
8. The "Configure H.E. Williams Connectivity" window will appear.
The Configure Tab
Setting Up Pricing, RFQ, and Invoice Services
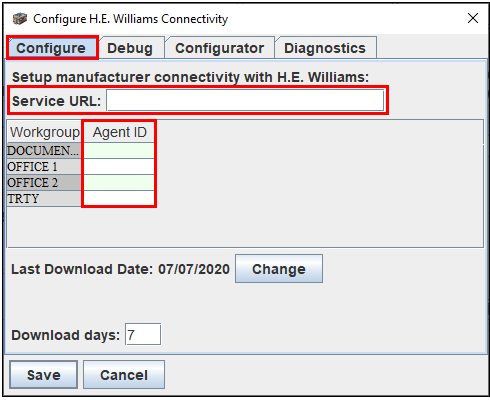
1. Enter the Service URL provided by HEW into the "Service URL" field. Note: the URL will default to http://ws1.hew.com/oasis/Oasis.svc.
2. Enter the Agent IDs provided by HEW into the "Agent ID" column for each respective Workgroup field.
Setting Up Invoice Download
1. Define the "Last Download Date" and "Download Days for HEW Invoices.
- Last Download Date- select the "Change" button to define the date to the day the downloads should start.
- Download Days- enter the number of days of which invoices should download. Note: this will automatically default to seven.
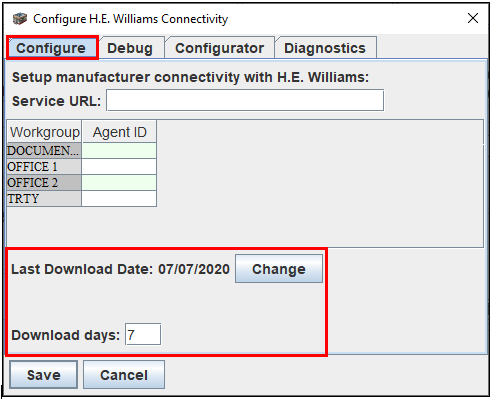
2. Select "Save." Note: users may now set up dynamic pricing. For more information, click here.
The Debug Tab
Use this tab to enable debug settings as instructed by OASIS Support.

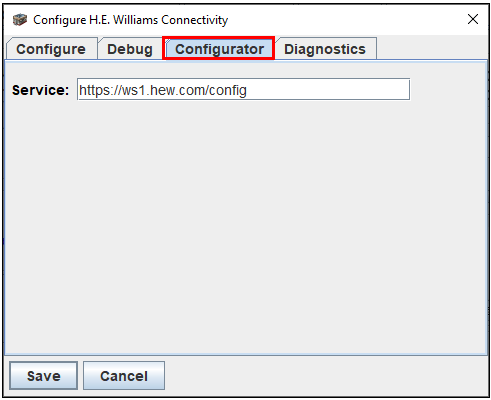
The Configurator Tab
1. Use this tab to enable the new HEW Configurator. For more information, click here.
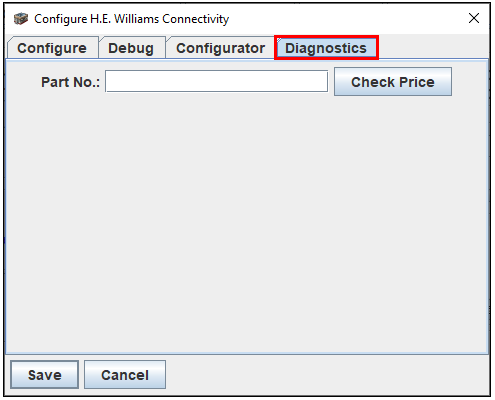
The Diagnostics Tab
1. Use this tab to test a part number's price.
Setting Up User Login
1. Navigate to the "Home" page.
2. Select the "HEW" menu.
3. Hover over "HEW" in the drop-down list, and then select "Set Login."

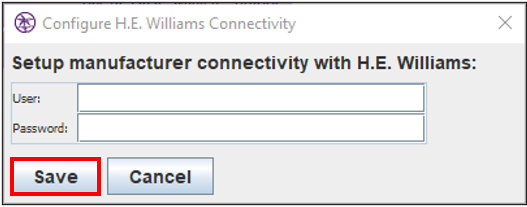
4. The "Configure H.E. Williams Connectivity" window will appear.
5. Enter the credentials provided by HEW into the "User" and "Password" fields.
6. Select "Save."
Comments
0 commentsPlease sign in to leave a comment.