Nearly identical to "Locations," OASIS users can configure "Departments" as well. Examples of departments include sales people, accountants, managers, etc.
1. Navigate to the Configuration page.
2. Select "Departments" from the drop-down list.
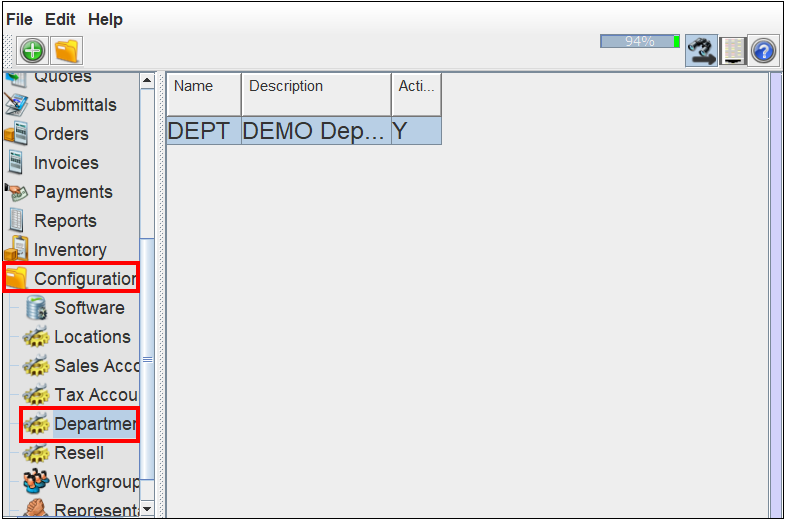
3. The following three columns will appear:
- Name- the location ID
- Description- an identifying description or explanation of the department
- Active- notes if the department is active or inactive. Note: if "Y" appears, the department is active. if "N" appears, the department is inactive.
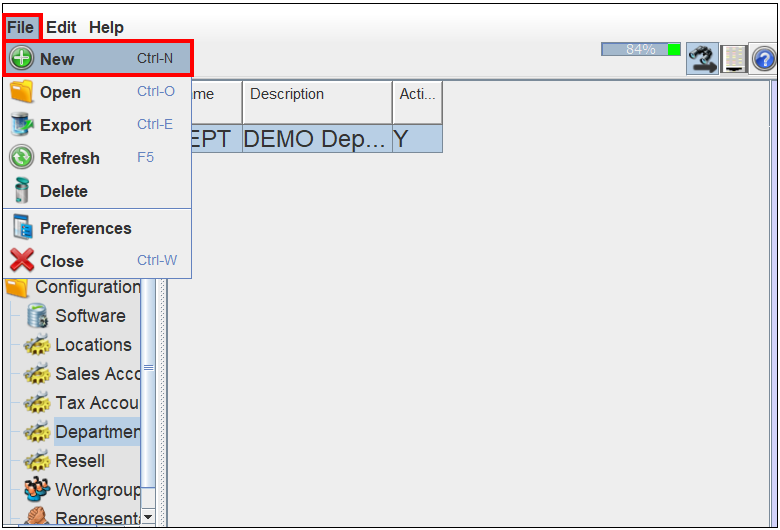
3. Select "File." Note: alternatively, select the  button.
4. Select "New Department."
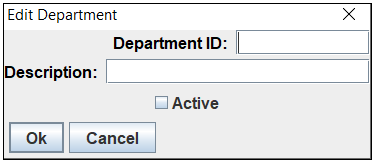
5. The "Edit Department" window will appear.
6. Enter a department name or ID.
7. Enter an identifying description for the department.
8. Check the "Active" box to activate the department.
9. Select "OK."
Comments
0 commentsPlease sign in to leave a comment.