The Contact Configuration Tool allows users to configure contact data. This includes configuring sales stages, groups, departments, and job positions. Once this information is configured, it can be applied to contact entries through the Contact Editor.
1. Navigate to the Contacts page.
2. Select "File."
3. Select "Configuration."
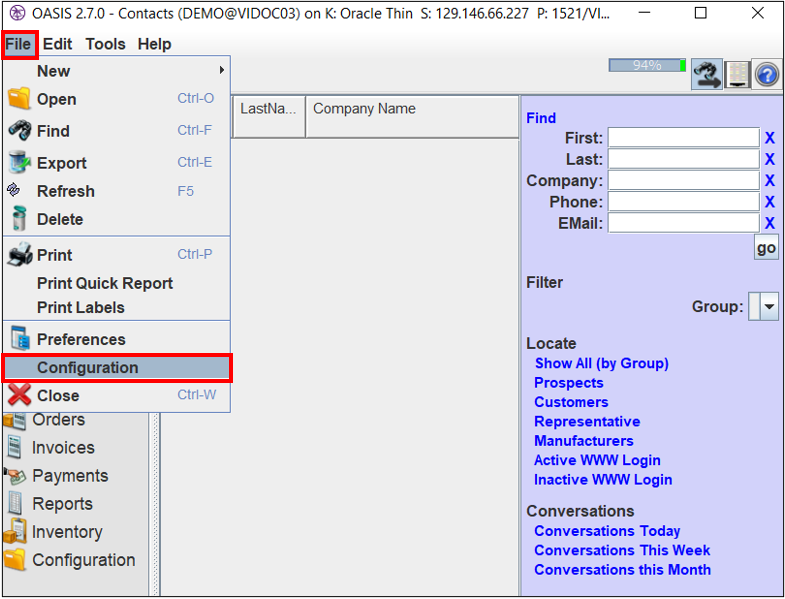
4. The "Configure Contact Data" window will appear.
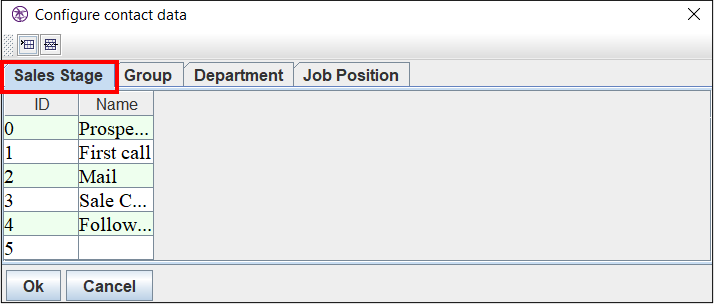
The Sales Stage Tab
1. Use this tab to configure sales stages that can be assigned to contacts as needed.
2. In the "Name" column, select the first blank line and enter a name for the sales stage. Note: the ID will appear automatically and in consecutive order.
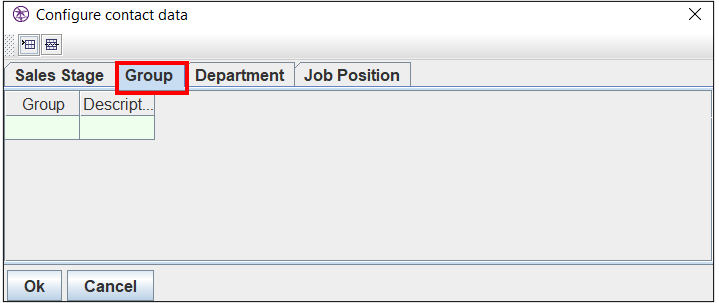
The Group Tab
1. Use this tab to configure company groups that contacts can be assigned to.
2. In the "Group" column, select the first blank line and enter a name for the group.
3. On the same line, enter an identifying description of the group.
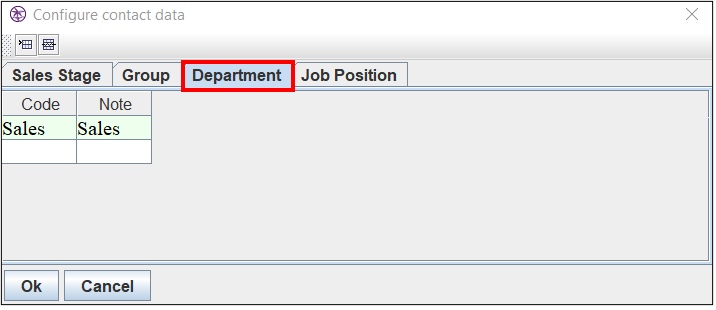
The Department Tab
1. Use this tab to configure company departments that contacts can be assigned to.
2. In the "Department" column, select the first blank line and enter a name for the department.
3. On the same line, enter an identifying description of the department.
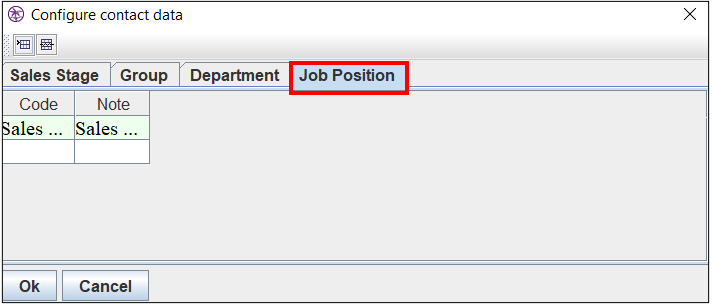
The Job Position Tab
1. Use this tab to configure job positions that contacts can be assigned.
2. In the "Code" column, select the first blank line and enter a job position.
3. On the same line, enter any notes related to the job position.
4. Select "OK."
Comments
0 commentsPlease sign in to leave a comment.