Once samples have been added to OASIS, users can check them out as needed. To complete this process, users must first create samples. For more information, click here.
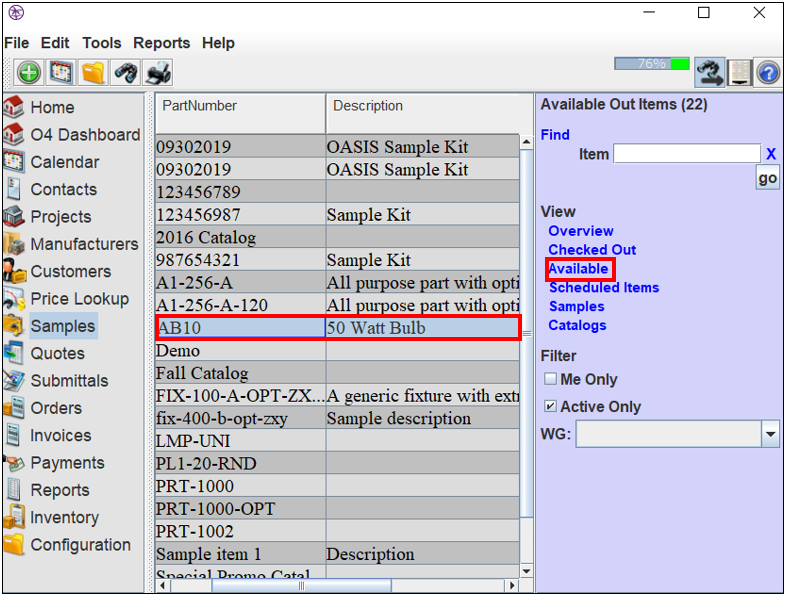
1. Navigate to the Samples page.
2. If needed, search for the needed sample or select the "Available" link in the blue search bar.
3. Double-click on the needed sample.
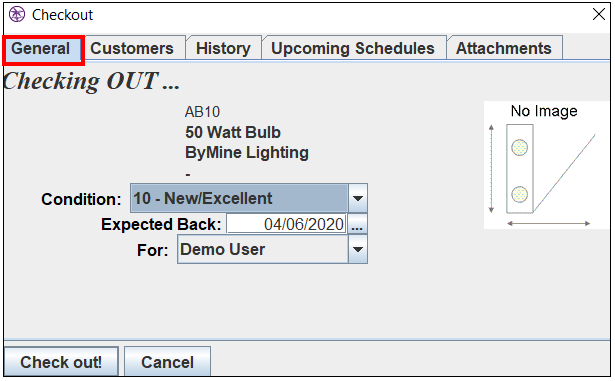
4. The "Checkout" window will appear.
5. In the "General" tab, select the appropriate condition from the drop-down list.
6. Enter the date the sample will be returned.
7. Select the user, who is checking out the sample, from the drop-down list.
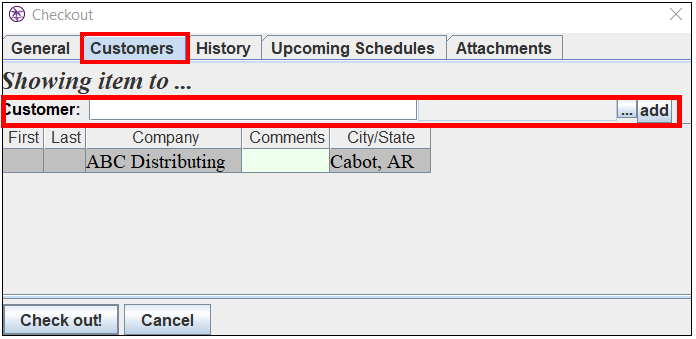
8. Select the "Customers" tab.
9. Enter the customer name or select the  button to search for the customer you are checking the sample out for.
10. Select "Add."
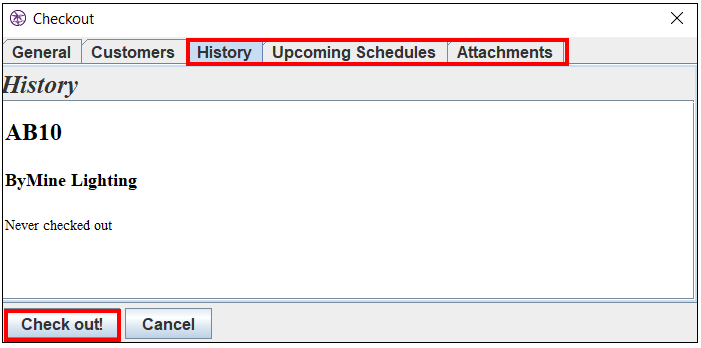
11. If needed, review the samples history, upcoming schedules, and attachments.
12. Select "Check out."
Comments
0 commentsPlease sign in to leave a comment.