Some manufacturers accept Hold For Release orders, and many do not. OASIS can account for these scenarios through various setup options allowing users to present the order according to manufacturer needs. Note: users must add the "Rel Now" column to the order, using the "Preferences" tool. For more information, click here.
Scenario 1: Manufacturer Accepts Hold For Release Orders
To begin this process, create a Hold For Release order and send it to the manufacturer. For more information on creating Hold For Release orders, click here.
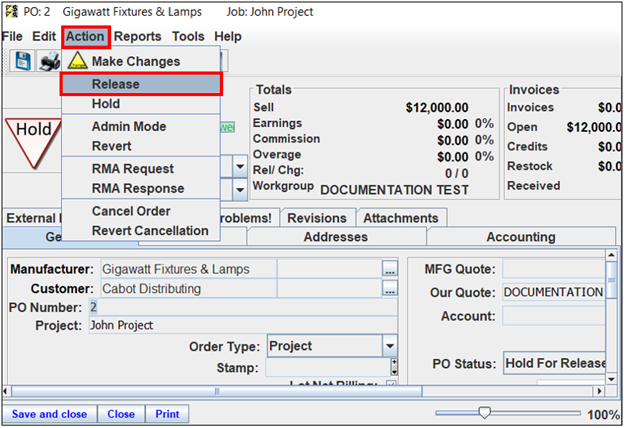
1. Navigate to the Orders page.
2. Open the needed Hold For Release order.
3. Select "Action."
4. Select "Release."
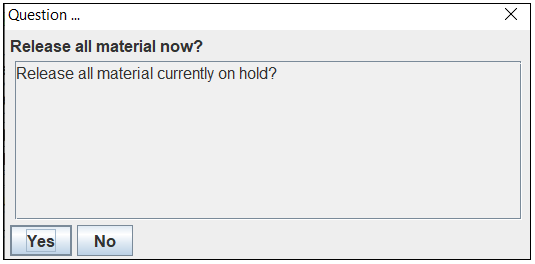
5. The "Question" window will appear, asking if you would like to release all material currently on hold.
6. Select "Yes" to release all items on the order OR select "No" to partially release items. Note: if "No" is selected, use the "Rel Now" column to release the needed items.
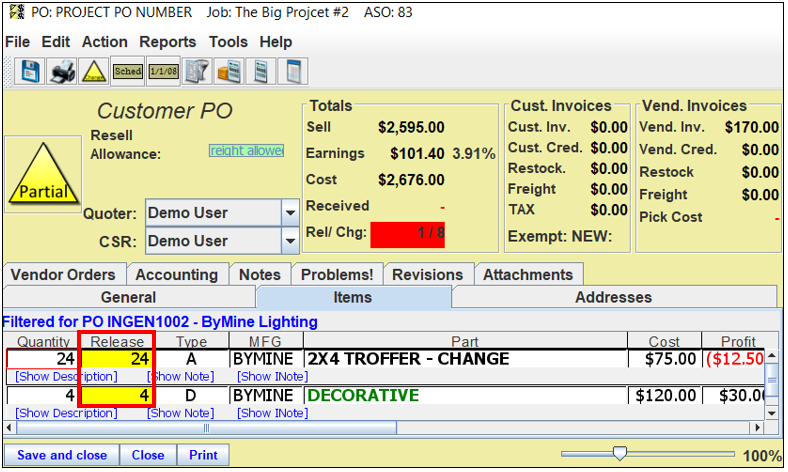
7. The "Release" column totals the quantities released to date (yellow). This keeps a running total of what has been released to date if there are multiple releases.
8. Use the "Rel Now" column to enter the amount being released at this time.

9. When completed, print the order.
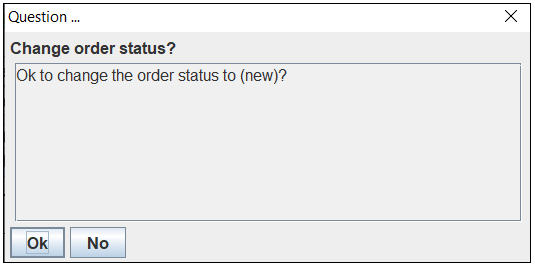
10. The "Question" window will appear, asking to change the order status to "New."
11. Select "Yes."
12. The printed order will appear similar to the one listed below.
13. Repeat the process above to release more item(s). Note: each subsequent release will be stamped as
"Release 2," "Release 3," etc.

Scenario 2: The Manufacturer Does Not Accept Hold For Release Orders
Note: to complete this process, ensure the needed manufacturer is set up to not accept Hold For Release orders. For more information, click here.
1. Navigate to the Orders page.
2. Create a Hold For Release order. For more information, click here.
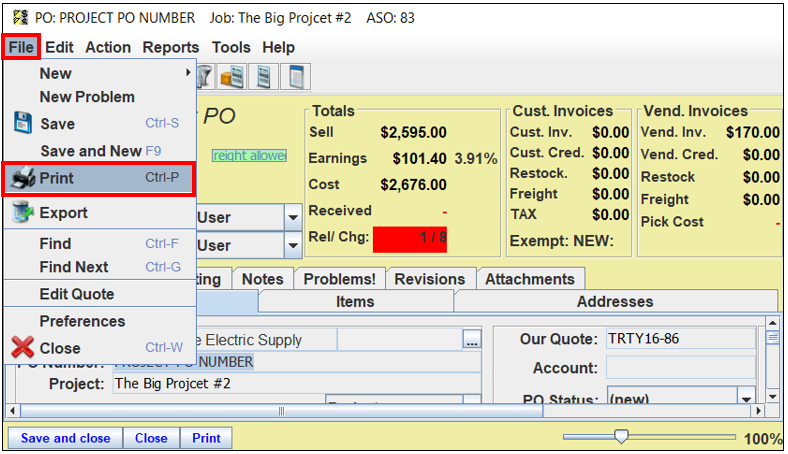
3. Select "Print" at the bottom of the screen. Note: alternatively, select "File" and then "Print."
4. The "Print order" window will appear.
5. Check the "Manufacturer Copy" box, and select "Internal Change" from the drop-down list. Note: the PO will be held "in house," and will not be sent to the manufacturer.
6. Select "OK."

7. Reopen the order.
8. Select "Action."
9. Select "Release."

10. The "Question" window will appear, asking if you would like to release all material currently on hold.
11. Select "Yes" to release all items on the order OR select "No" to partially release (items). Note: if "No" is selected, use the "Rel Now" column to release the needed items.

12. The "Release" column totals the quantities released to date (yellow).
13. When completed, print the order.
14. The "Print Order" window will appear.
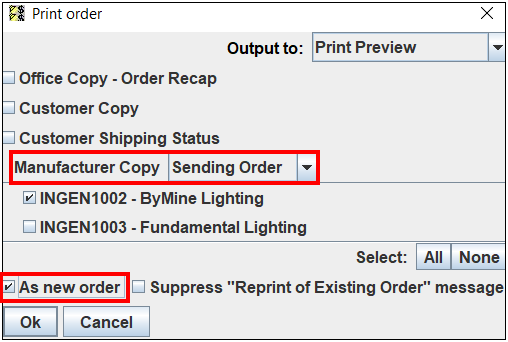
15. Check the "Manufacturer Copy" box and select "Sending Order" from the drop-down list.
16. Check the "As New Order" box.
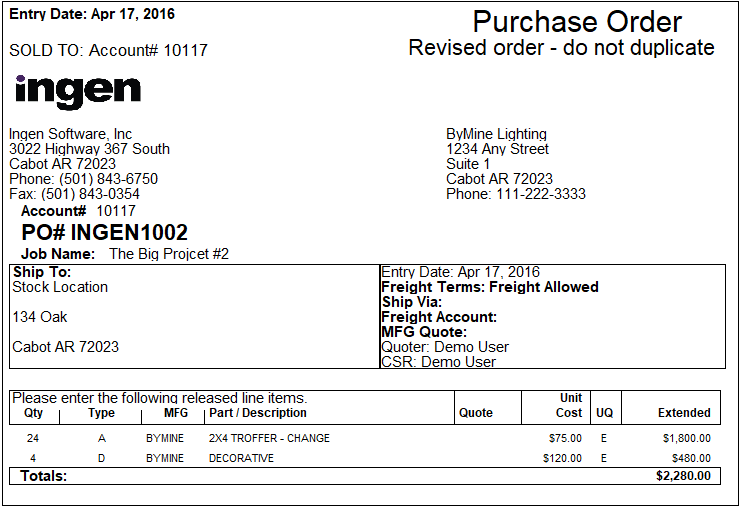
17. Select "OK." The order will appear similar to the one listed below.
Comments
0 commentsPlease sign in to leave a comment.