Influence is a method for automating the sales account credit process when specifiers are entered on a project, quote, or order. Note: in general, specifiers are those who specify or approve of work processes. They are generally engineers, architects, designers, etc. They are not typically distributors or contractors. The following information is used to calculate influence within OASIS:
- Customer roles- the specifier type. For more information, click here.
- Customer ranks- the ranking of the customer's overall ability once a sales account has been assigned to the customer. For more information, click here. Note: it is recommended that users consult with customer support before making changes.
Influence is determined as the percentage form of the customer rank for each customer role. This is used to show how much influence a customer will have on the job based on the rank and role assigned to the customer. For example, if the customer was set to have an "A-Best" ranking, then the customer may have a greater influence on a project than another whose ranking may be set to "C."
Viewing Customer Influence
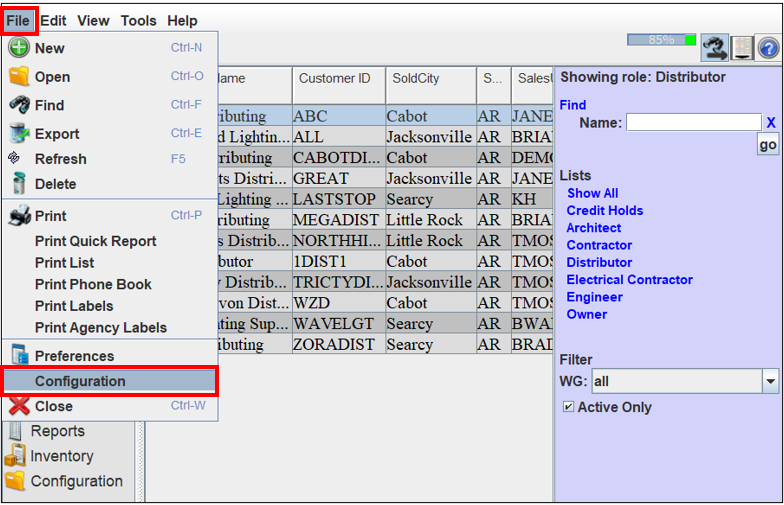
1. Navigate to the Customers page.
2. Select "File."
3. Select "Configuration."
4. The "Configure Business Data" window will appear.
5. Select the "Influence" tab.
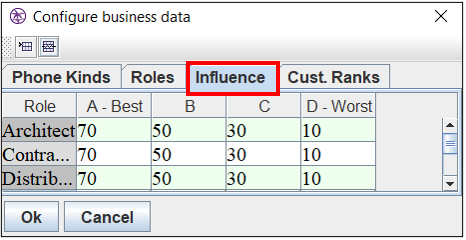
The "Influence" tab lists the customer roles, as well as the rank assigned to each role. OASIS takes this information to calculate a percentage of influence. Note: the influences listed above are the default settings. It is recommended that users consult with customer support before making changes.
Using Influence to Automate Sales Account Credit Process
The steps listed below explain how to assign roles to customers and to enter this information into a project, allowing OASIS to automatically calculate influence and sales credit.
Determine the Customers Classification
1. Navigate to the Customers page.
2. Create a new customer or open an existing customer.
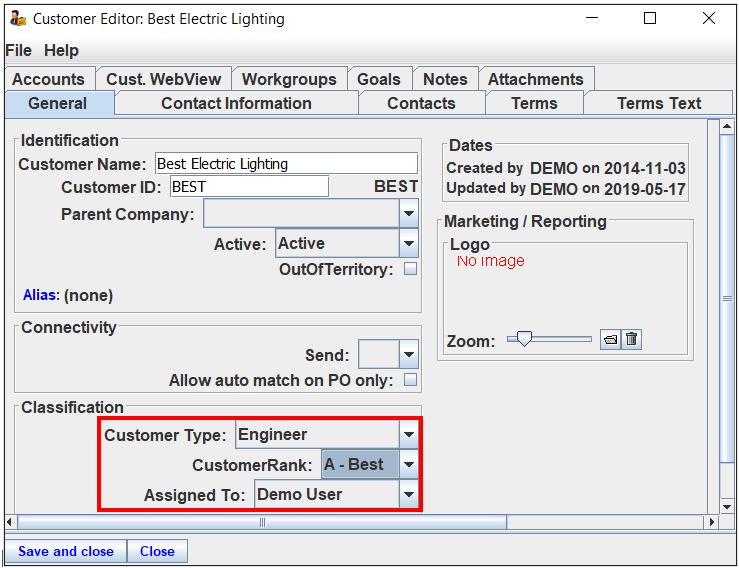
3. Select the "General" tab.
4. In the "Customer Type" field, select the specifier type from the drop-down list. Note: this example will use "Engineer."
5. In the "Customer Rank" field, select the customer's ranking.
6. In the "Assigned to" field, select the sales account assigned to this customer.
7. Select "Save and Close."
Entering Specifiers in Projects, Quotes, or Orders
1. Navigate to the Projects page.
2. Create a new project or open an existing project.
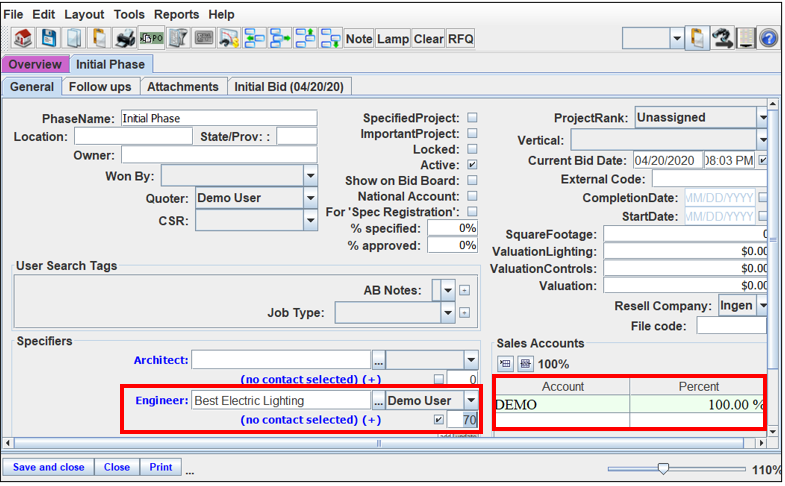
3. Select the "General" tab.
4. In the "Specifiers" area, locate the customer type that was selected in the previous section. this example will use "Engineer." Note: if another customer type was selected in the previous section, use the same customer type in the project. For example, if "Designer" was selected as the customer role in the previous section, use the "Designer" field in the project.
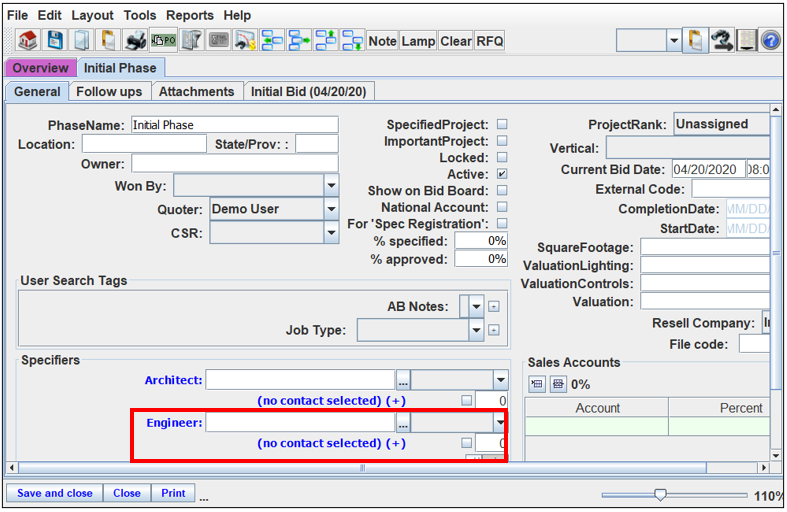
5. In the "Engineer" field, select the customer. Note: the assigned sales account, customer ranking, and influence will appear automatically.
6. The sales account credits will populate automatically. Note: ensure sales account credit percentages are accurately configured. For more information, click here.
Comments
0 commentsPlease sign in to leave a comment.