O4 allows users to geotag, or assign geographical coordinates, a customer in O4. This helps facilitate a smooth drop off process for O4 Samples by automatically selecting the customer in the "Drop Off Location" drop-down if the user is within a mile of the customer's geotagged location. This article will explain how to geotag a customer. Note: geotagging must be completed through a https URL.
1. Select the ![]() icon.
icon.
2. Select "Customers" from the drop-down menu.

3. The Customer Listing will appear.
4. Open a customer entry.
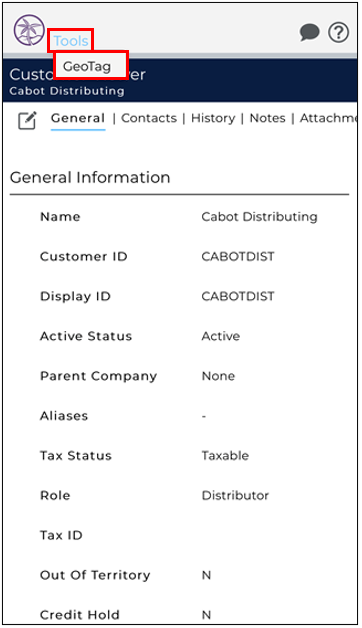
5. The Customer Editor will appear.
6. Select "Tools."
7. Select "Geotag."
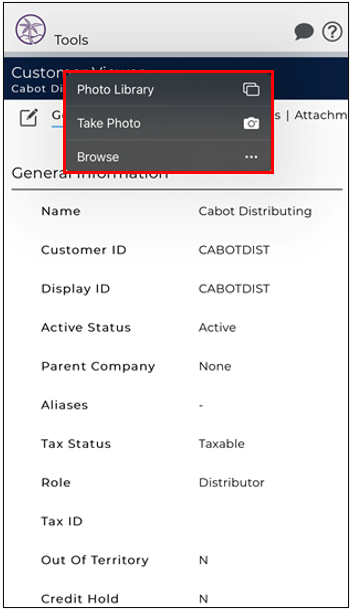
8. A pop-up will appear asking the user to upload a photo of the building.
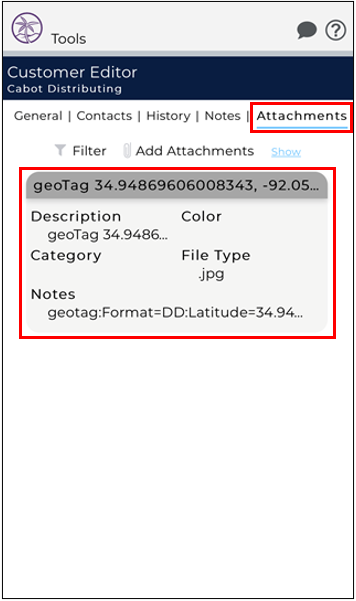
9. Once a photo is uploaded, users will be redirected to the Attachments tab where the geotagged photo will appear.
The customer will now be automatically selected when dropping off a sample in O4 if the user is within a mile of the customer's geotagged location.
Comments
0 commentsPlease sign in to leave a comment.