Users with admin access can create new users, assign them to workgroups, set percentages of credit received, assign security access, and more. This article will explain how to create a user in O4 and defines the fields within the user creation process. Note: some features are only available through the User Editor, such as two factor authentication and assigning work covers. For more information about the User Editor, click here.
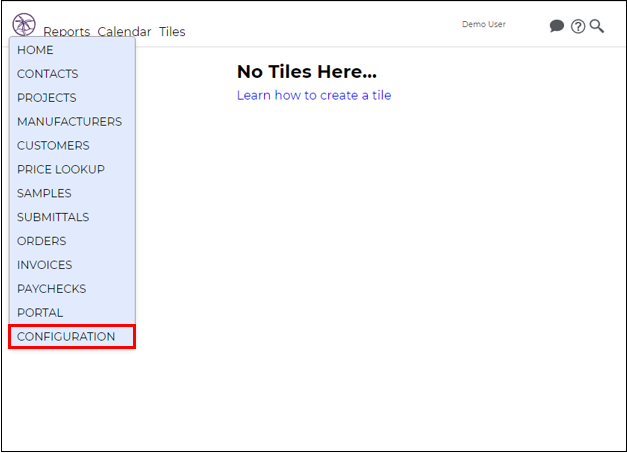
1. Click the ![]() icon.
icon.
2. Select Configuration from the drop-down list.
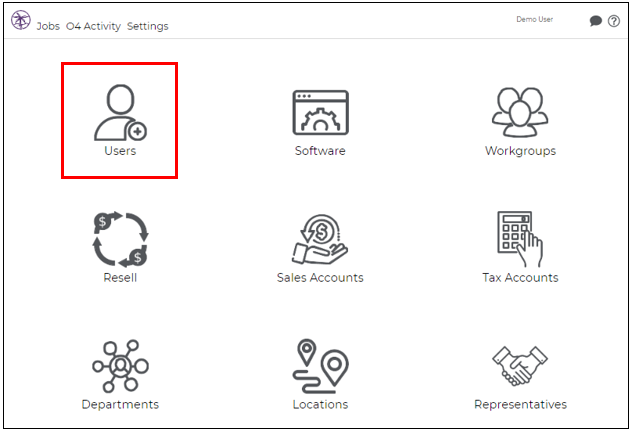
3. Click Users.
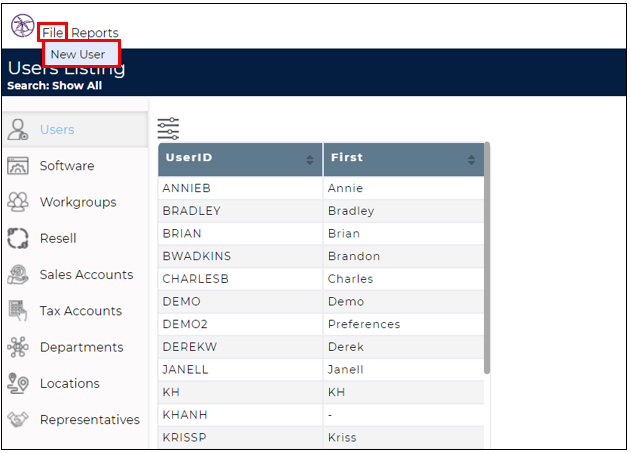
4. Click File, then New User.
5. The New User screen will appear.
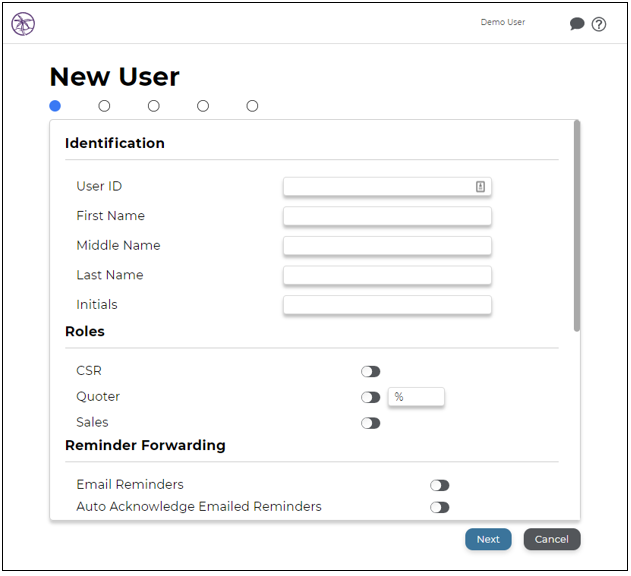
Identification
6. Enter the user's identifying information.
- User ID- the username entered when logging into Legacy OASIS.

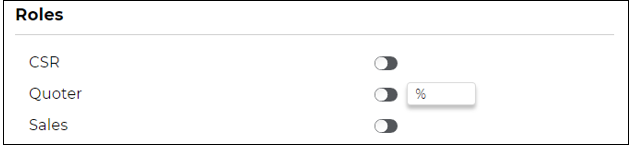
Roles
- CSR- turn on if the user creates orders at any time.
- Quoter- turn on if the user creates projects/quotes at any time. The percentage field allocates a percentage of credit on a transaction. Note: selecting this role will automatically default users to edit mode when opening a project.
- Sales- turn on if the user is a sales person and has a sales account.
Reminder Forwarding
- Email Reminders- turn on for reminders to be emailed to the user.
- Auto Acknowledge Emailed Reminders- turn on for reminders to be automatically acknowledged after the email is sent.

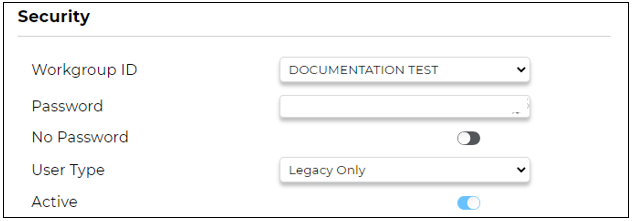
Security
- Workgroup ID- the workgroup the user is assigned to.
- Password- enter the password. Note: leave blank and check "No Password" if the user does not require a password. A password is required for Hybrid and O4 user types.
- No Password- turn on if the user does not have a password.
- User Type- select the user type that accurately explains the user's needed access to Legacy OASIS and O4. For more information, click here.
- Legacy Only- user can access Legacy OASIS, but not O4
- O4 Only- user can access O4, but not Legacy OASIS
- Hybrid (O4/Legacy)- user can access both Legacy OASIS and O4
- API Access- user can access O4 via API only
- OASIS Service- user is used only for the set up of services in OASIS requiring email notifications, such as Conversations, and cannot access Legacy OASIS or O4
- Active- turn on to make the user active.
Payday Reporting
- Comm. Account- select the user's sales account from the drop-down menu to set them up to receive credit for commission.
- Percent of Commission- percent of commission the user receives.
- Percent of Overage- percent of overage the user receives.
- Percent of Margin- percent of margin (for resell) the user receives.

7. Click  .
.
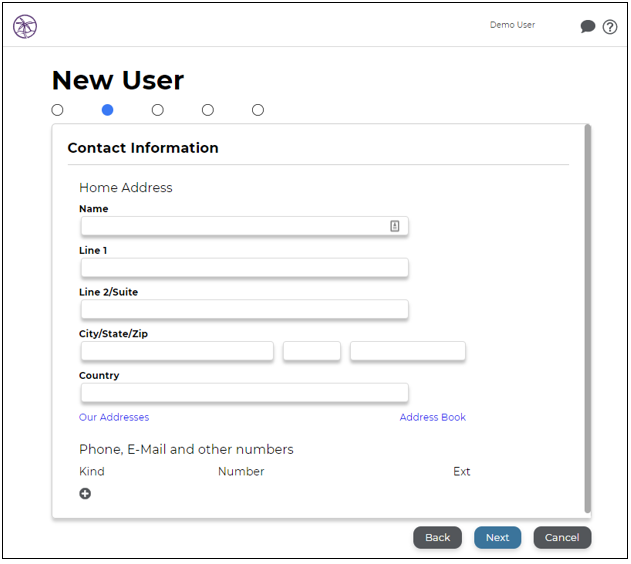
8. Enter the user's contact information.
Home Address
Enter the user's home address, or use the Our Addresses or Address Book to auto fill the information.
- Our Addresses- use a workgroup's address for the user
- Address Book- use a customer's or manufacturer's address for the user
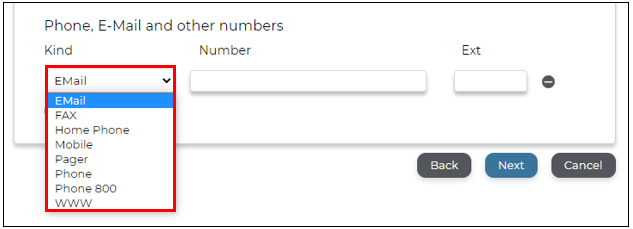
Phone, E-Mail, and Other Numbers
Click  to add the kinds set up in customer configuration. Note: an email is required to log into O4.
9. Click .
10. Define the user's security settings. To learn more about what each checkbox means for its respective row and column, click here. Note: check the box in the column name to automatically check all boxes in the column.

11. Click .
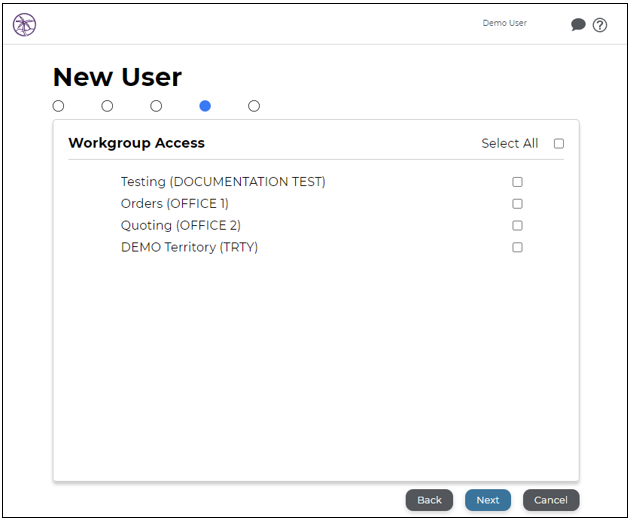
12. Define additional workgroup access for the user. This allows the user to have the option to choose a workgroup when creating a transaction. Note: it is not necessary to grant access to the default workgroup set up in the Security section.
13. Click .
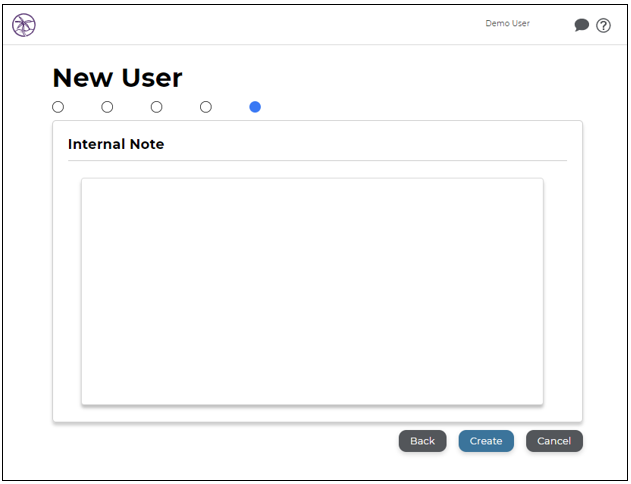
14. Enter any internal notes pertaining to the user.
15. Click  .
.
Comments
0 commentsPlease sign in to leave a comment.